
Five9
How it works
- Capacity runs a report containing details of the calls to download
- A metadata file & name is constructed from the above report results
- Capacity downloads the associated audio of the call, attaching the information gathered from the above report
This article shows you how to use Five9 Contact Center Software to integrate with Capacity and import your call audio and metadata.
Before You Begin
Before you can integrate Five9 with Capacity to import your call audio and metadata, you'll need:
- A Five9 account with Administrator privileges
- Five9 Administrator Application (also known as VCC Admin Console)
- An SFTP server accessible from Conversation Intelligence
If you require Capacity to host your SFTP files, please contact creovai-support@capacity.com
Make sure this is done before starting your configuration
Create a Five9 Account
You'll need to create a new account for Capacity. This will allow us to run a report within your Five9 instance.
- Select the Administrator option to download and run the Admin tool via VCC Admin
- Navigate to the Users folder.
- Right-click the Users folder and select Add user from the context menu
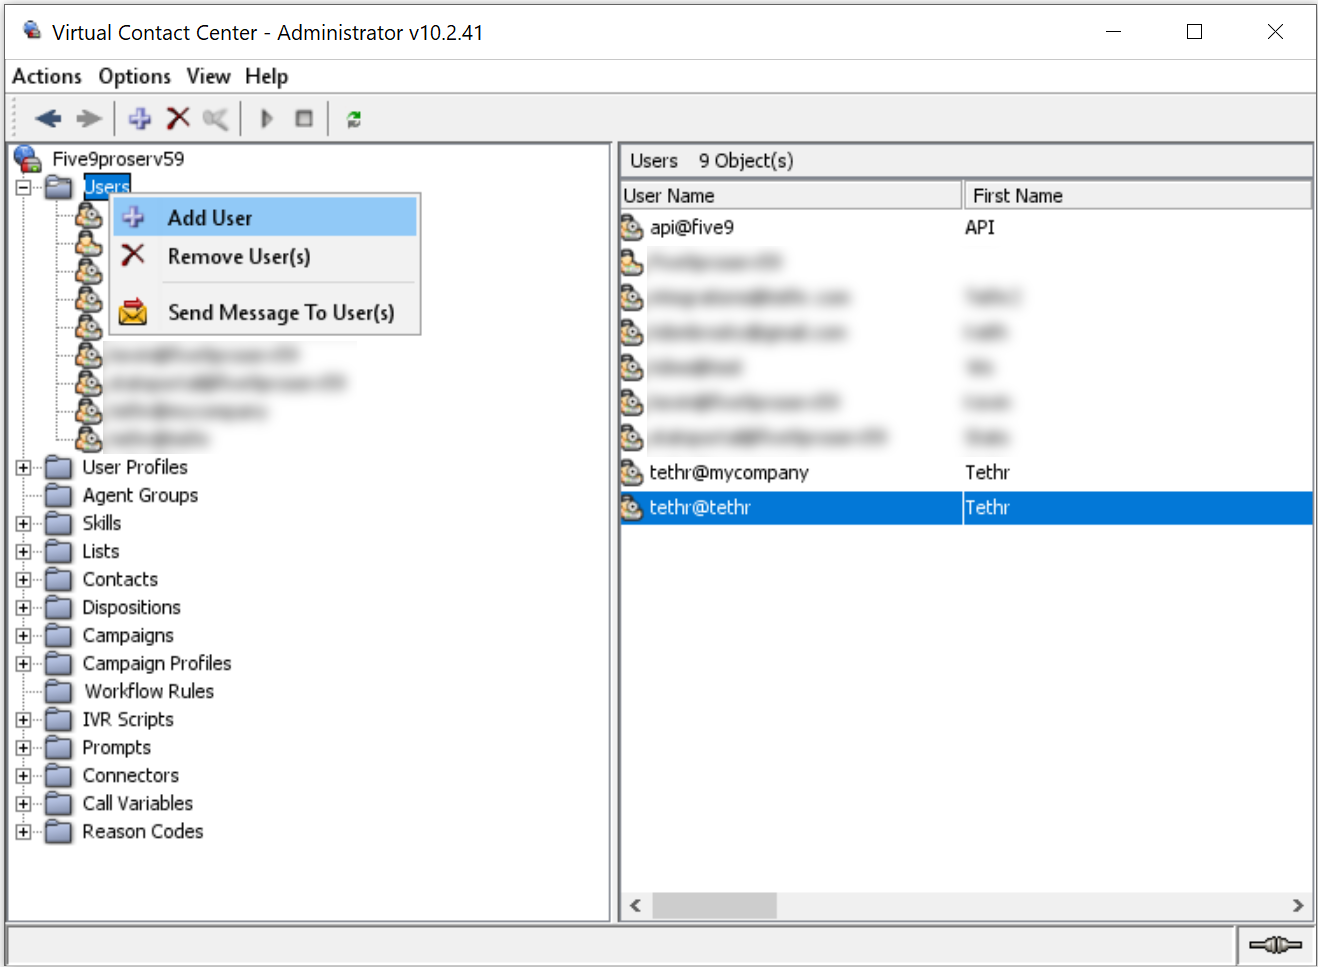
- Under the General tab, enter the user profile info as follows:
If a field is not mentioned, leave blank
| Name | Value |
|---|---|
| First Name | Enter Capacity as first name |
| Last Name | Enter APIUser as last name |
| Full Name | Leave auto-populated |
| Email Address | Enter integrations@Capacity.com |
| Username | Capacity@<<yourcompanydomain>> (e.g. Capacity@yourcompany.com) Do not accept the default username |
| Password | Enter a temporary, strong password. Capacity will reset on first use |
| Start Date | Accept the default. |
| User Time Zone | Use (GMT+00:00) UTC, UTC |
| Locale | If locale selection is enabled, select US English. |
| User Is Active | ✅ |
| User Can Change Password | ✅ |
| User Must Change Password on Next Login | ✅ |
| Users Can Access Billing Tab | ❌ |
- Select the Roles tab
- Select Add
- Select the Reporting role
- Select OK
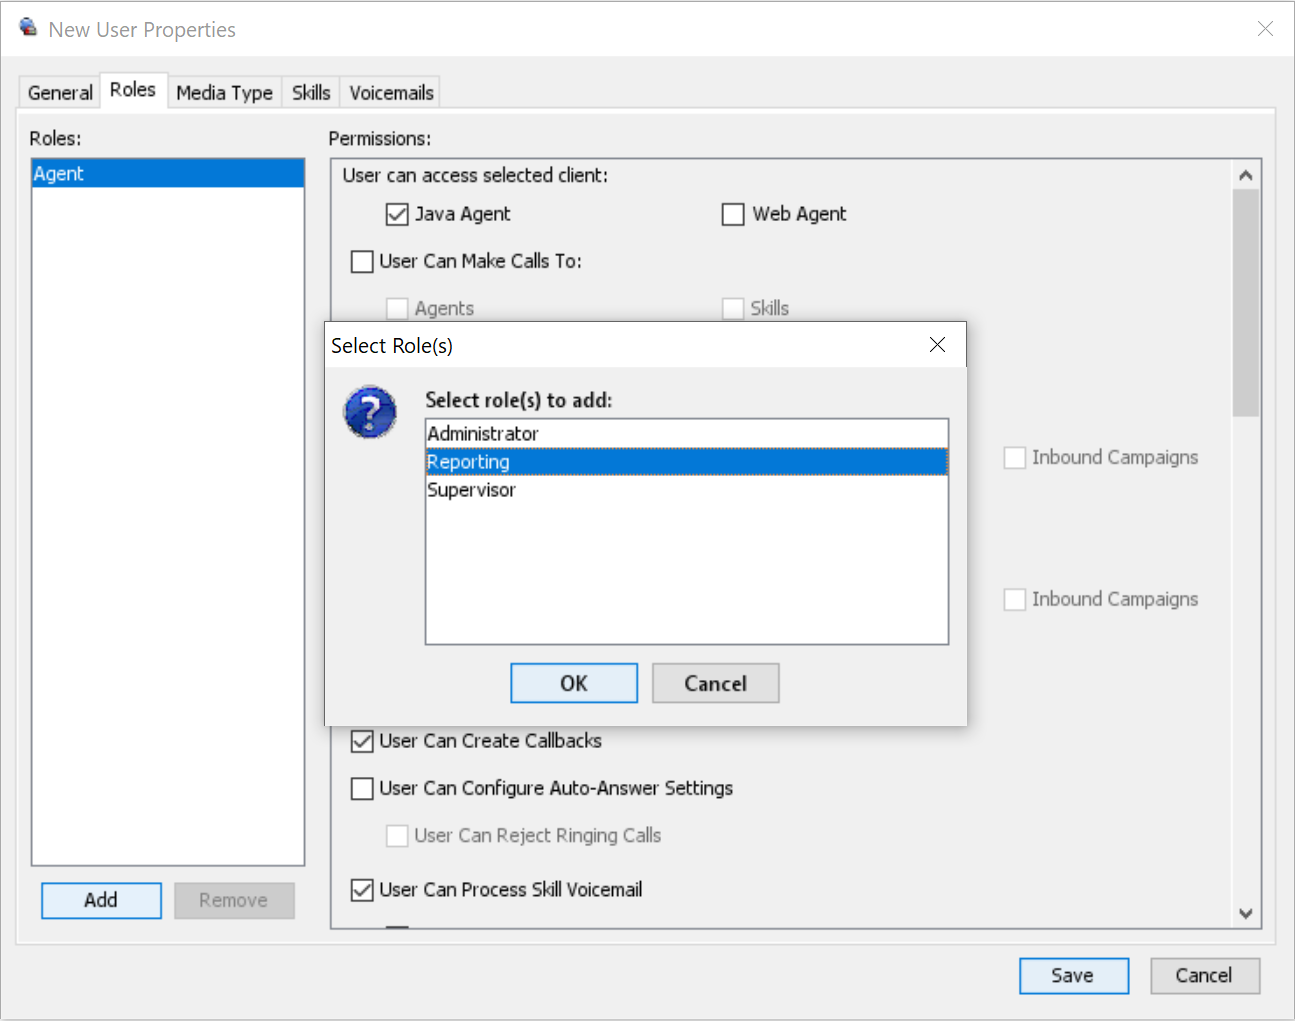
- Selecting the Reporting role
- Select onlythe following permissions:
- User Can Access the Recordings Column
- User Can View Custom Reports
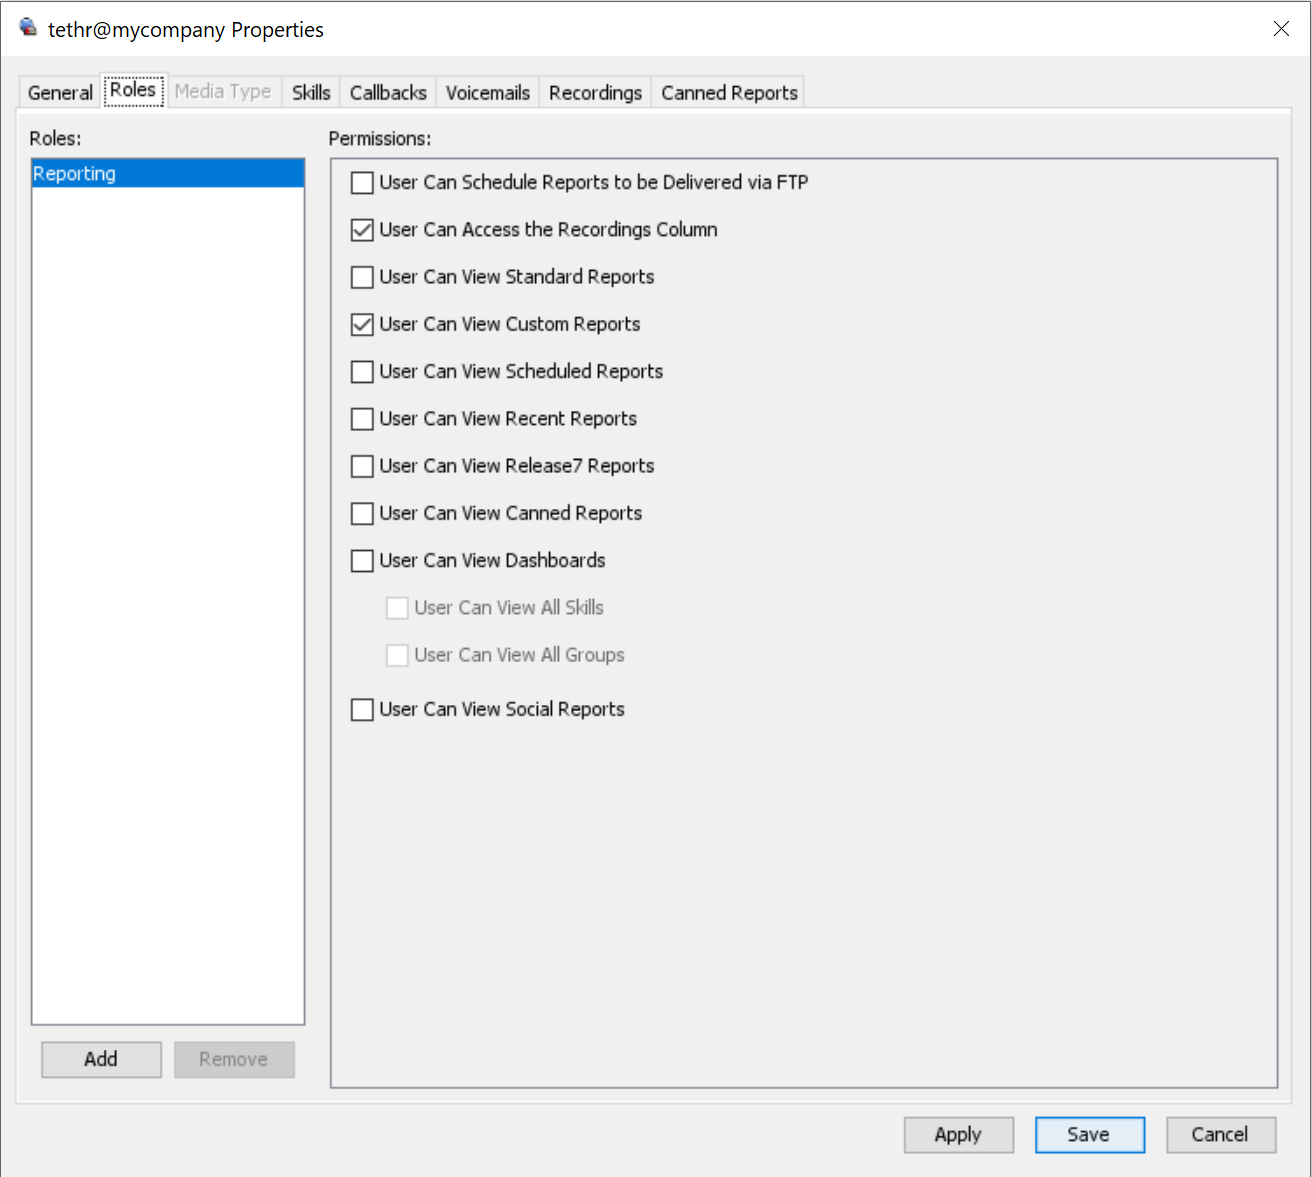
- Select Add
- Select the Administrator role
- Select OK

- Select Limited Permissions
- Select onlythe following permissions:
- User can access Java VCC Administrator application
- User can use Administrator Services
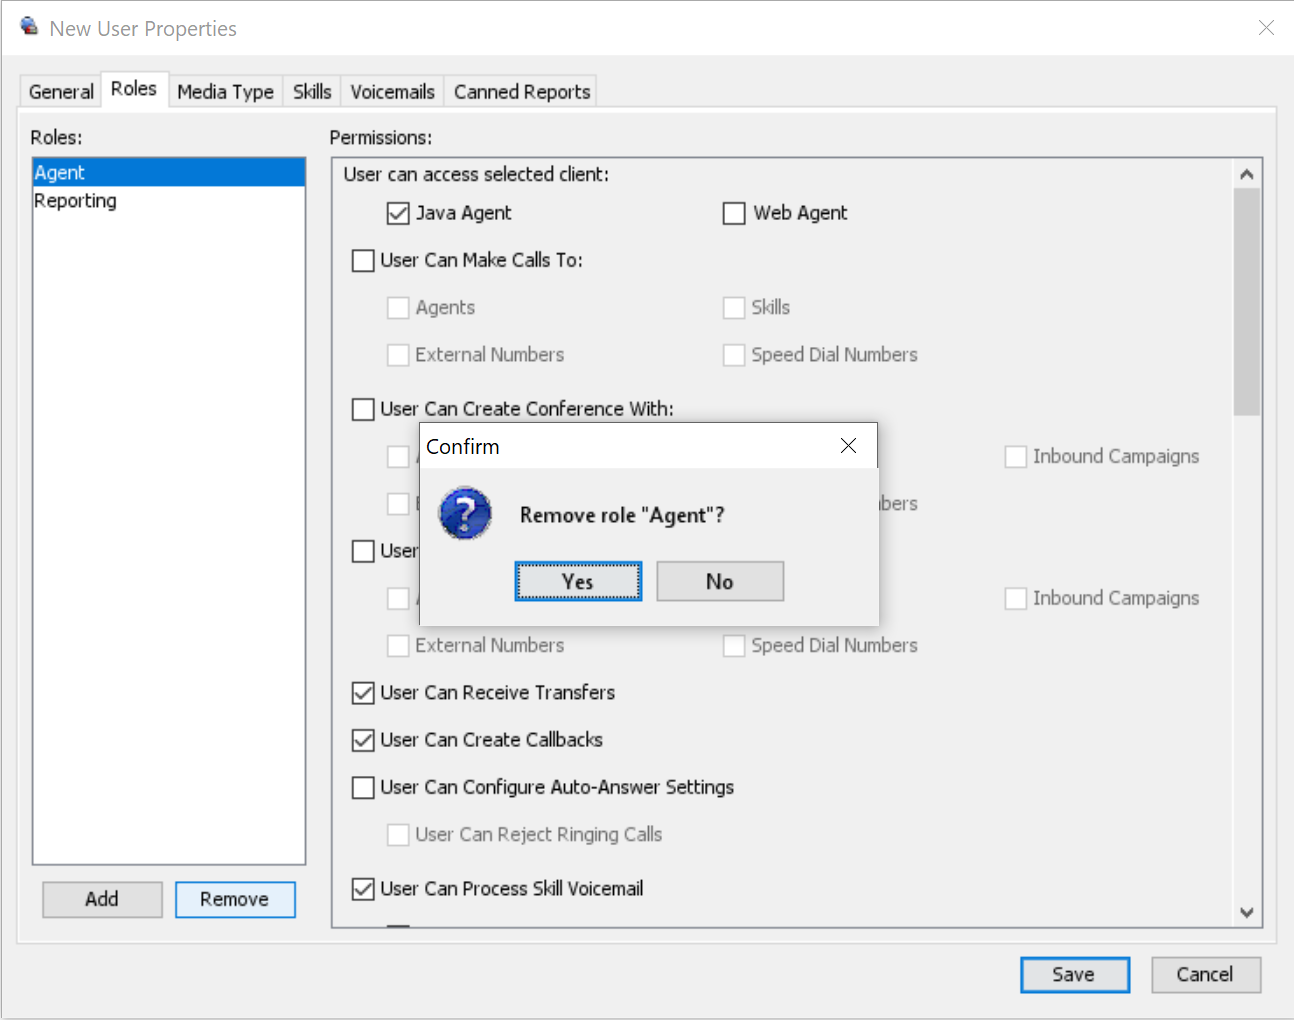
- Select the (default) Agent role
- Click Remove, then select Yes to remove the role
Create Five9 Report
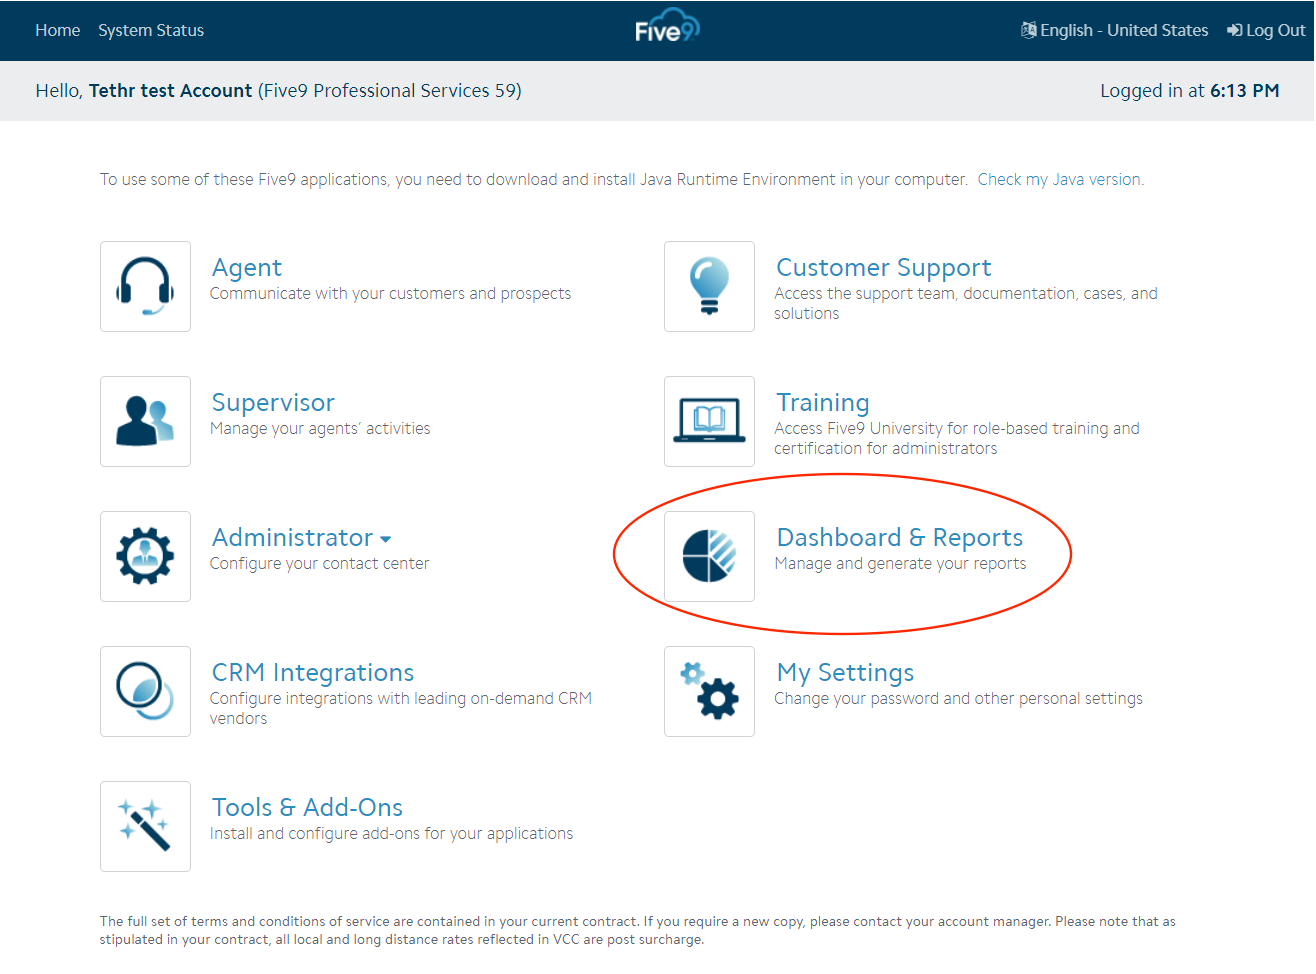
- Select Dashboard & Reports
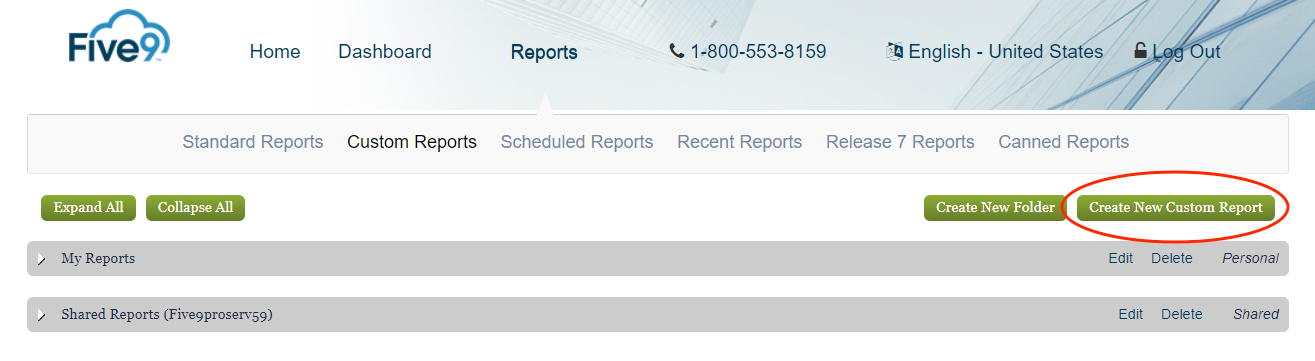
- Under Reports, choose the Custom Reports tab.
- Select Create New Custom Report
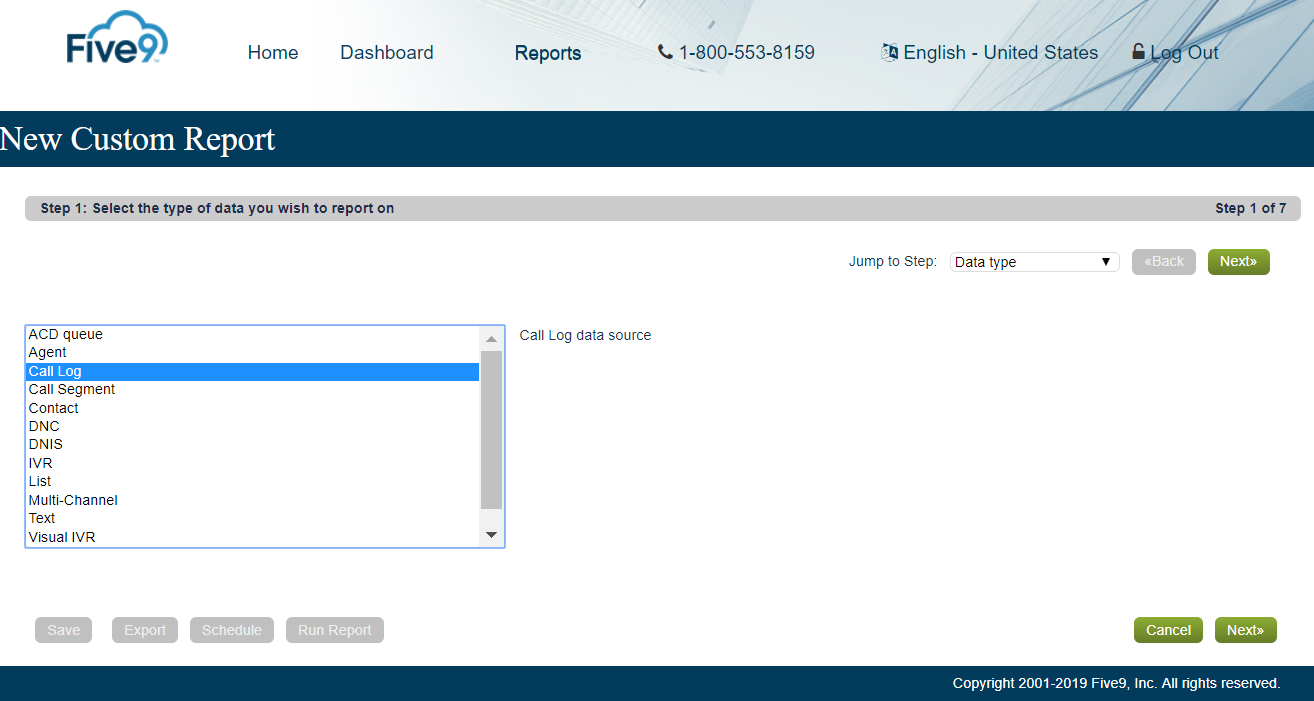
- Select Call Log
- Select Next
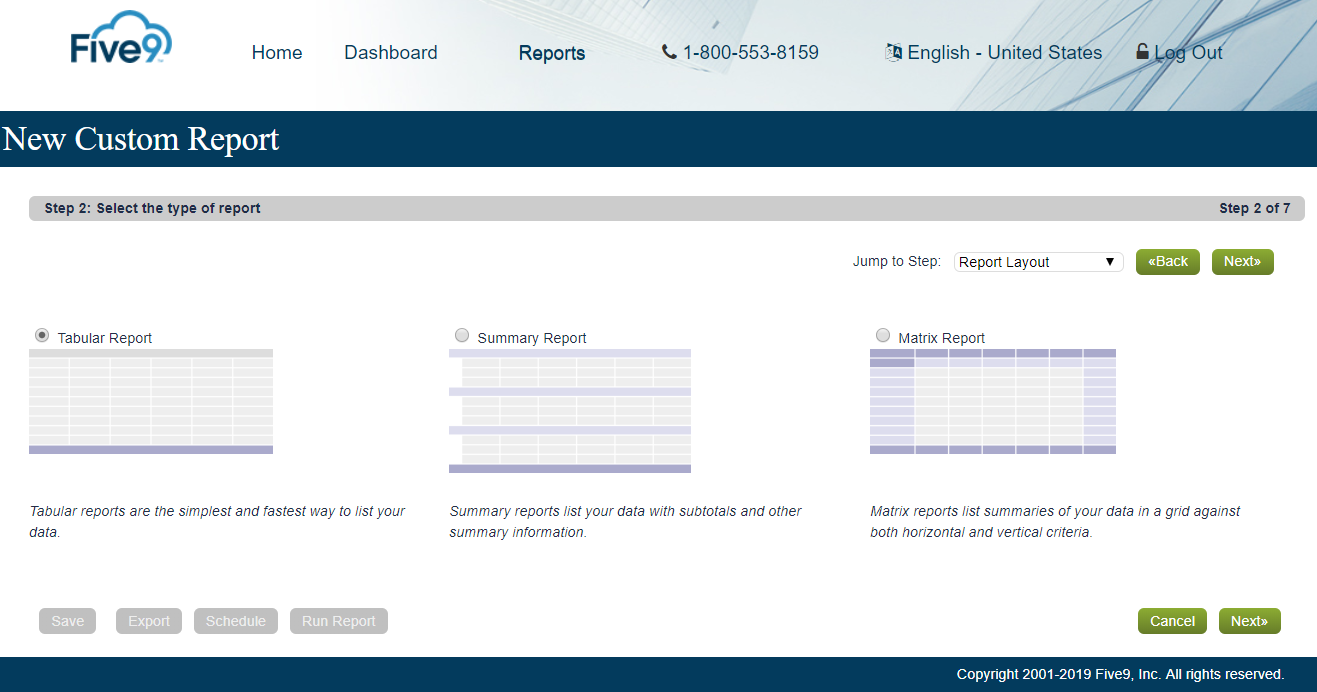
- Select Tabular Report
- Select Next
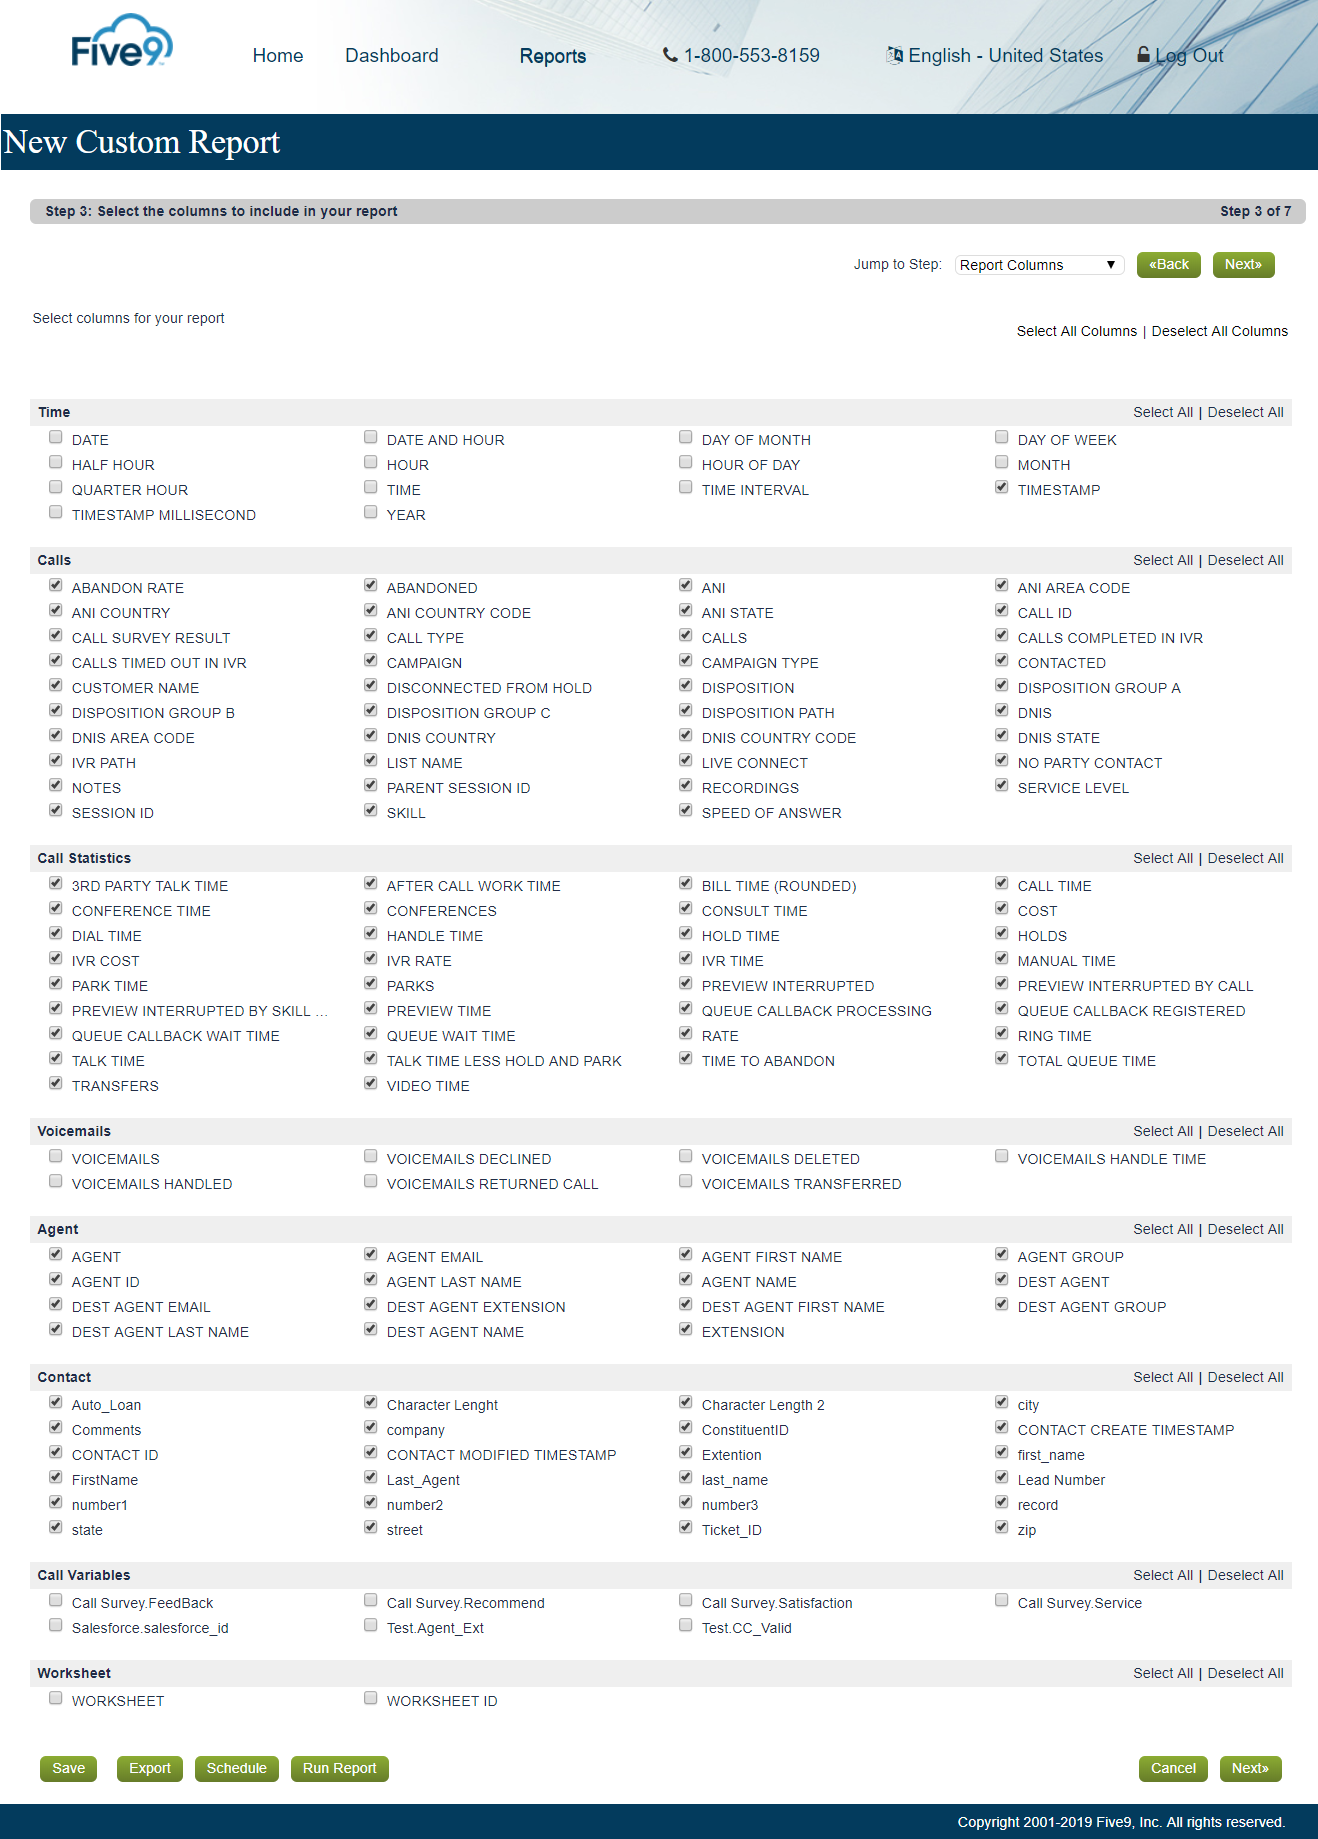
- Select Timestamp within the Time section
- Click Select Allfor the following sections:
- Calls
- Call Statistics
- Agent
- Contact
- Select Next
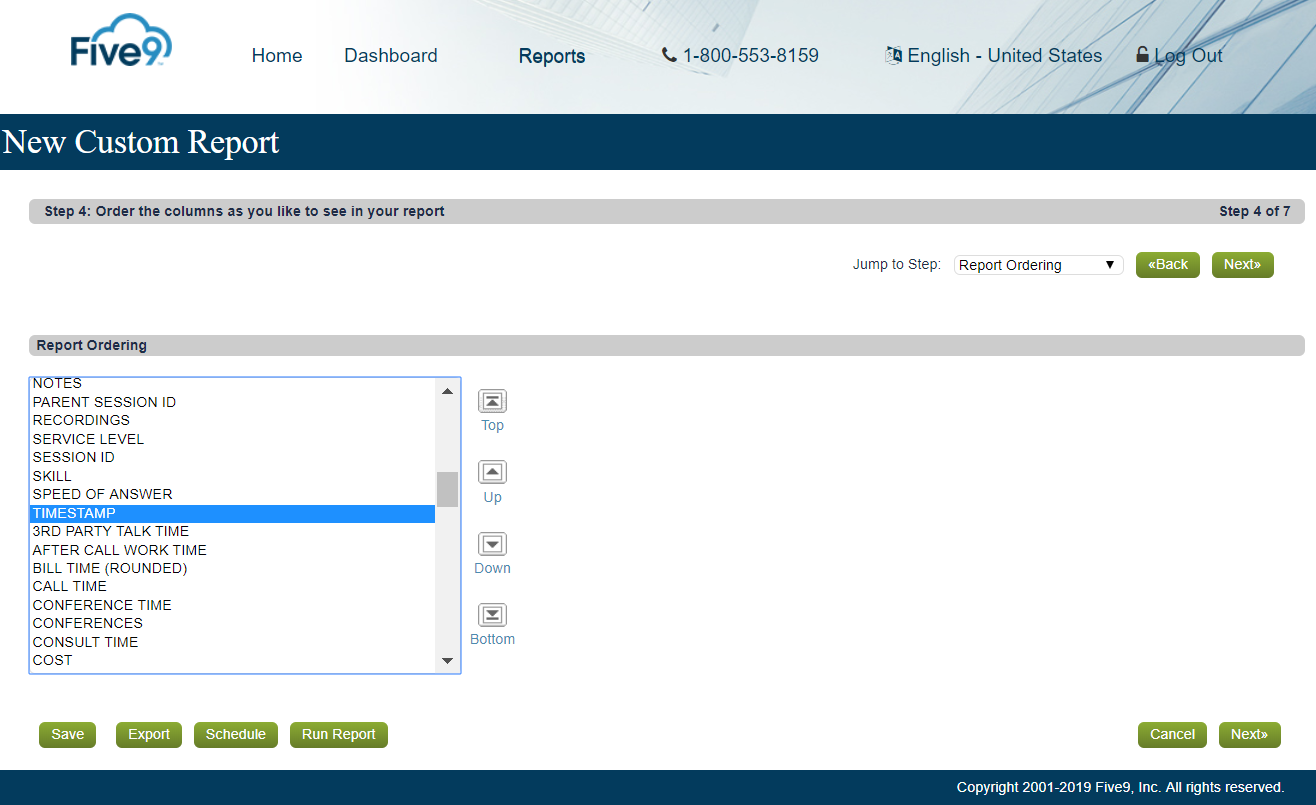
- Select Timestamp within Report Ordering
- Select Next
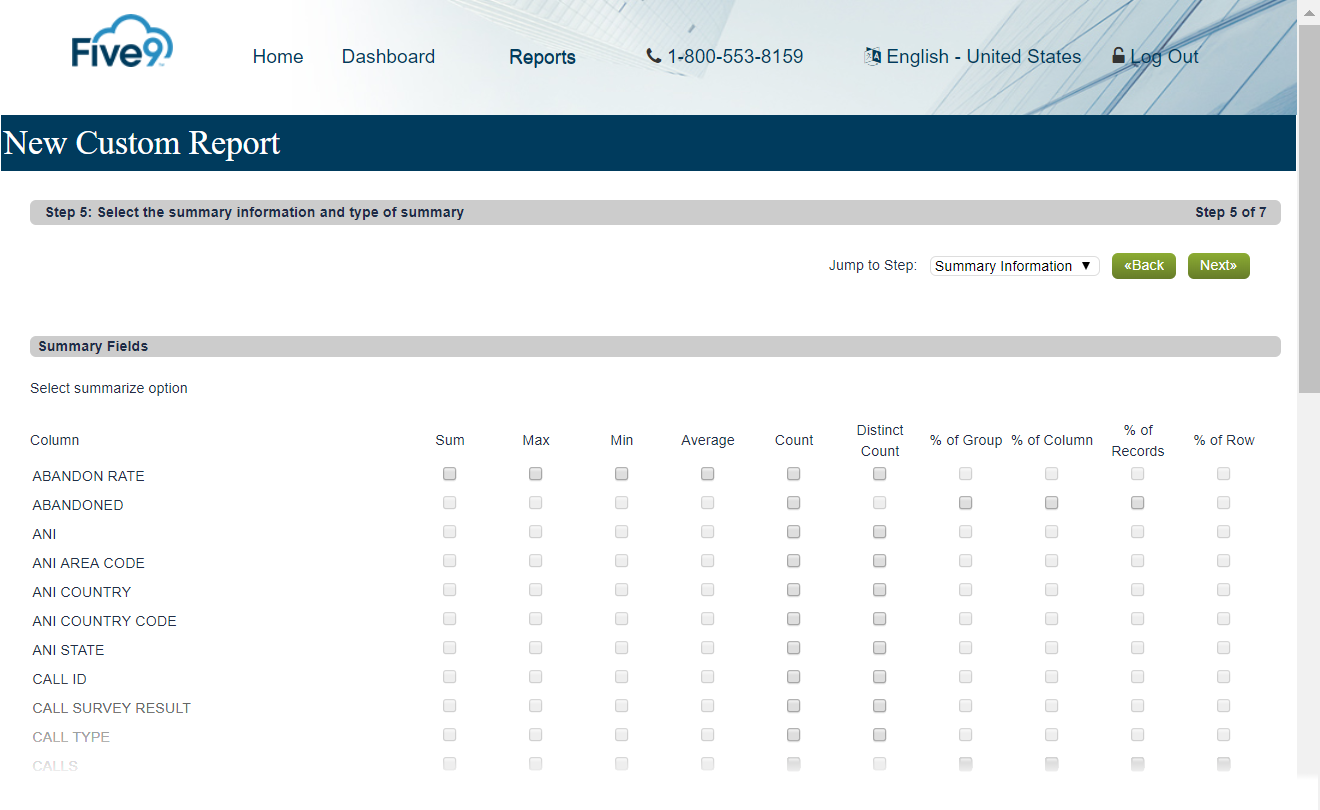
Please be sure that all options on the Summary Fields page are deselected
- Select Next
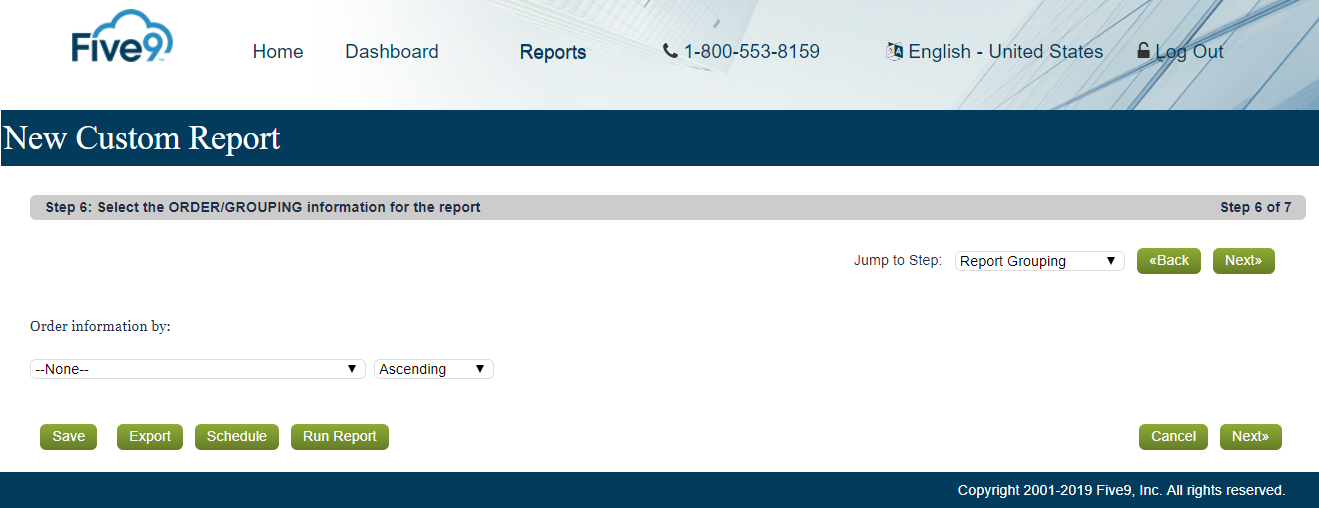
- Select Next to advance you to the final page
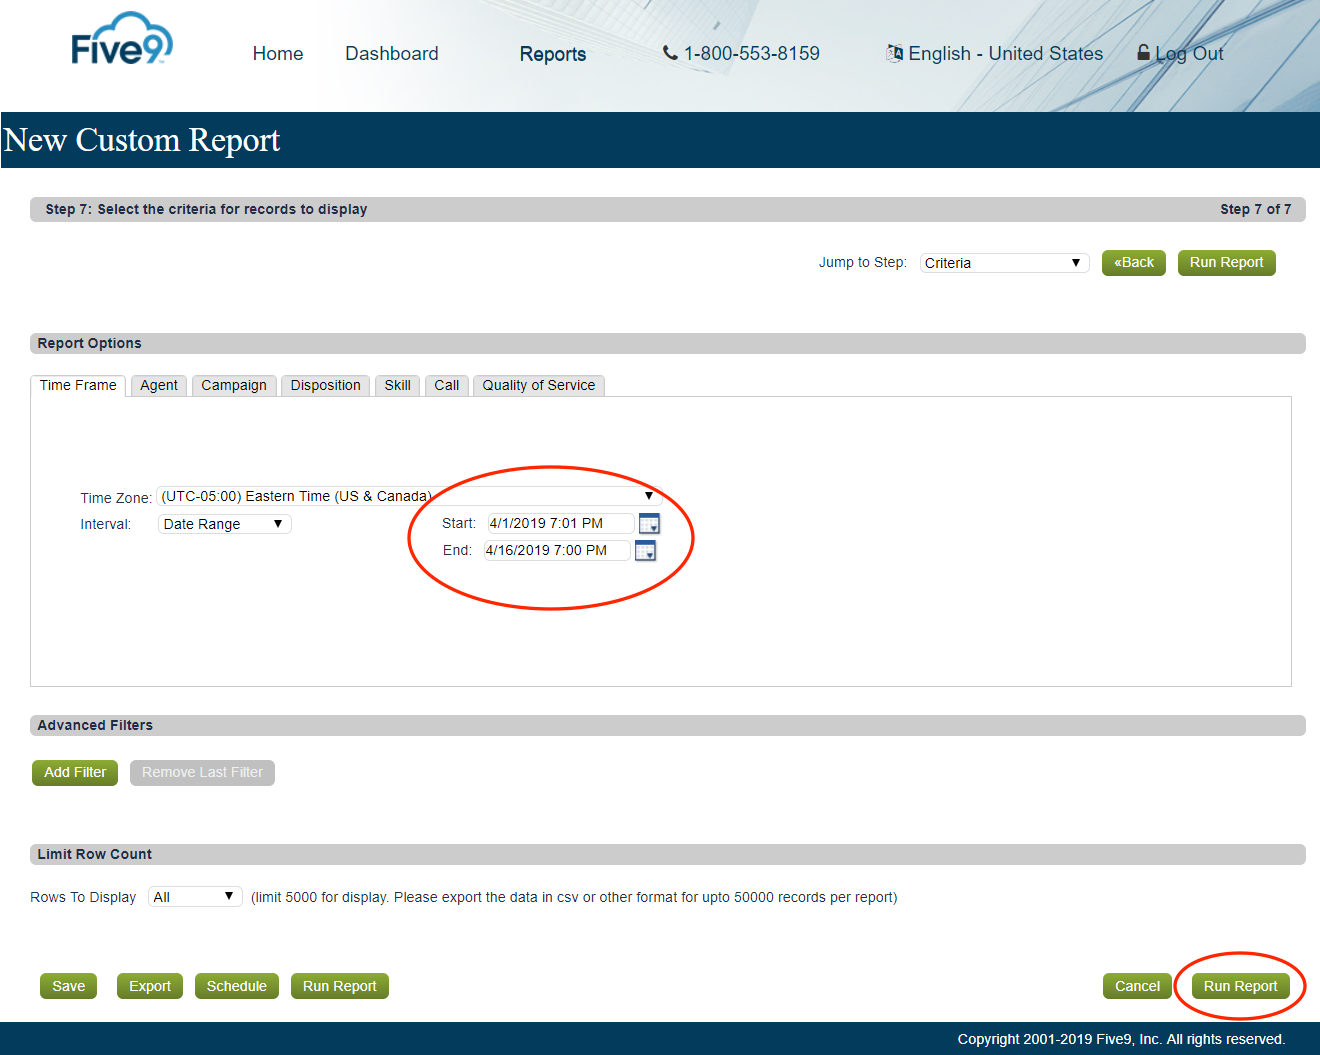
- Select a date range interval where you know calls exist
The selected date range is for first run only. Each run from Capacity will select an up to date range.
- Select Run Report
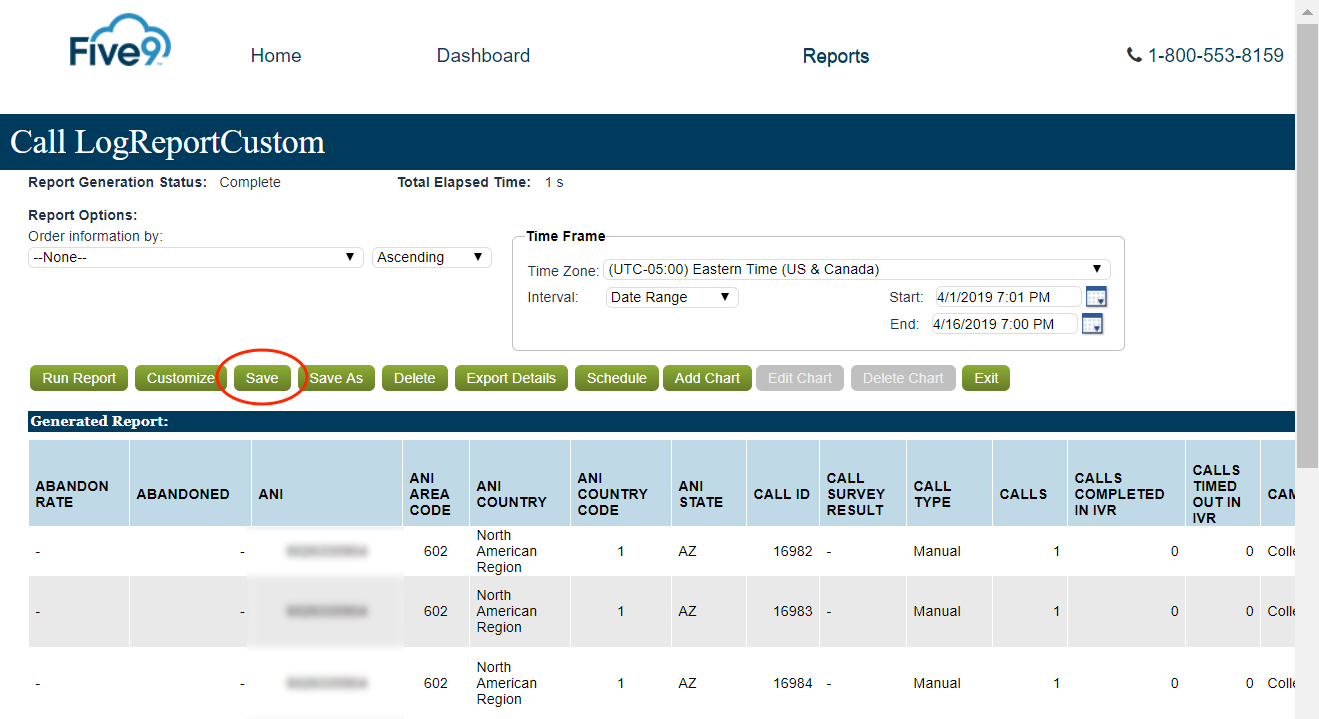
- Select Save
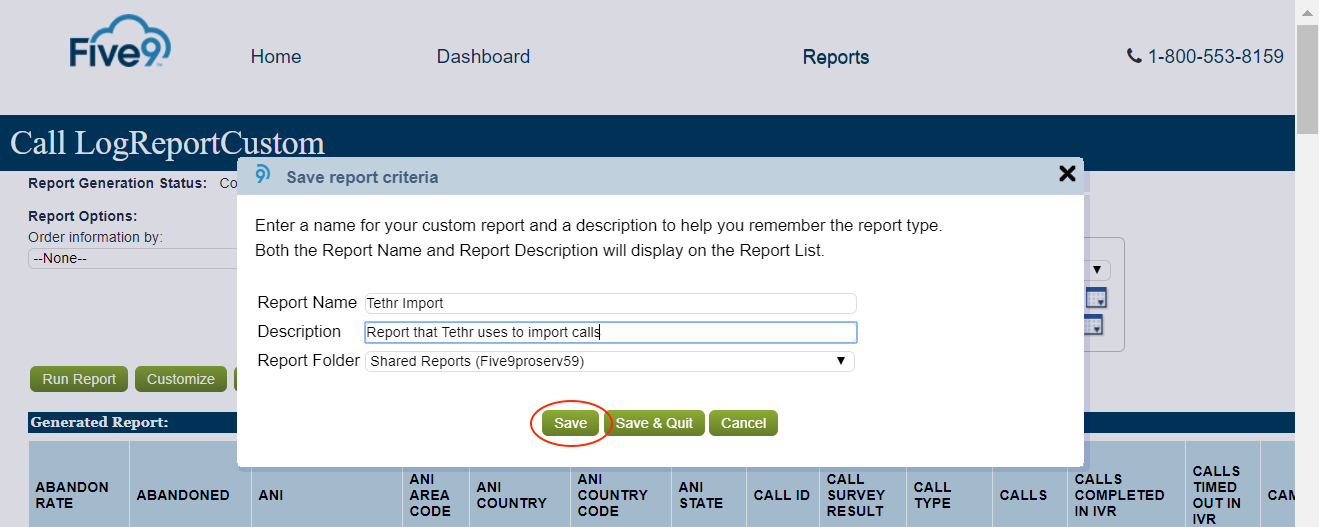
- Enter a Report Name
Recommended report name: Capacity Import
- Select Shared Reports within Report Folder
- Select Save
Configure Five9 Export
For Capacity to access and download your audio files, the file name must come from the data in the report
- Select Administrator to download and run the Admin tool via VCC Admin
- Select Actions and Configure
- Select the Export tab
- Select Advanced Recordings
- Select Add under Destinations
- Enter the following information in the Destination:
| Name | Value |
|---|---|
| Name | CapacityExport |
| Protocol | SFTP |
| Hostname | SFTP hostname |
| Port | 22 |
| Username | SFTP Username |
| Password | SFTP Password |
| Time Zone | (GMT+00:00) GMT, GMT |
- Select Test
Confirm successful connection before continuing
- Select OK
- Select Add below Upload Rules
- Select Add within Filter
- Select Call.start_timestamp from the drop-down menu.
- Select Constant under Criteria Value and configure a date and time.
The date and time should match the earliest call date you have agreed to import to Capacity
Contact Capacity before setting a date further back than 1 week
- Select OK
- Select Add under Destinations
- Select the destination set up in the previous step
- Set Delivery to Individual Recordings – Entire Calls
- Configure the Recording File Name Pattern (per the below screenshot)
- Select OK
The filename pattern must match exactly as below
- Return to Advanced Recordings tab
- Select Save
- Select Exit
What Capacity Will Share
If Capacity are hosting the SFTP for you, we will share the following details:
| Field | Description |
|---|---|
| SFTP Hostname | SFTP host for file transfer |
| SFTP Username | Username for SFTP audio upload from Five9 |
| SFTP Password | Password for SFTP audio upload from Five9 |
SSH connection is also supported, please contact Capacity for details on how to configure this
What to Share with Capacity
| Field | Description |
|---|---|
| Username | Username created in Create Five9 Account section above |
| Password | Password associated with username |
| Five9 Region | The region your Five9 instance resides (US, UK, EU, CA) |
| Report Folder Name | Folder name where the report resides. Recommended setup: Shared Reports |
| Filename Pattern | Pattern configured above. Recommended setup: /recordings/{SESSION ID}@{datefmt h_mm_ss tt}.wav |
| Report Name | Name of the report. Recommended setup: Capacity Import |
| Customer Phone Field | Report field that contains the customer phone number |
| Customer Name | Report field that contains the customer name |
| Outbound Queues | Queue names for outbound calls |
| IP Address(es) | The public IP address(es) of the server uploading to the Capacity SFTP - For Capacity to add to whitelisting |
| SFTP Credentials | If Capacity SFTP is not used, share credentials for Capacity to download Audio files |
Always share credentials securely, never send as plain text in an email