Set up Salesforce interaction triggers in Creovai
Learn how to set up your Salesforce triggers, or the customer calls, support case messages and chats you want to sync between Salesforce and Creovai.
Part 2 of 3 - Getting started: The following steps are the second part of a three-part process. If you have not Connect Salesforce with Creovai, please do so first before proceeding below.
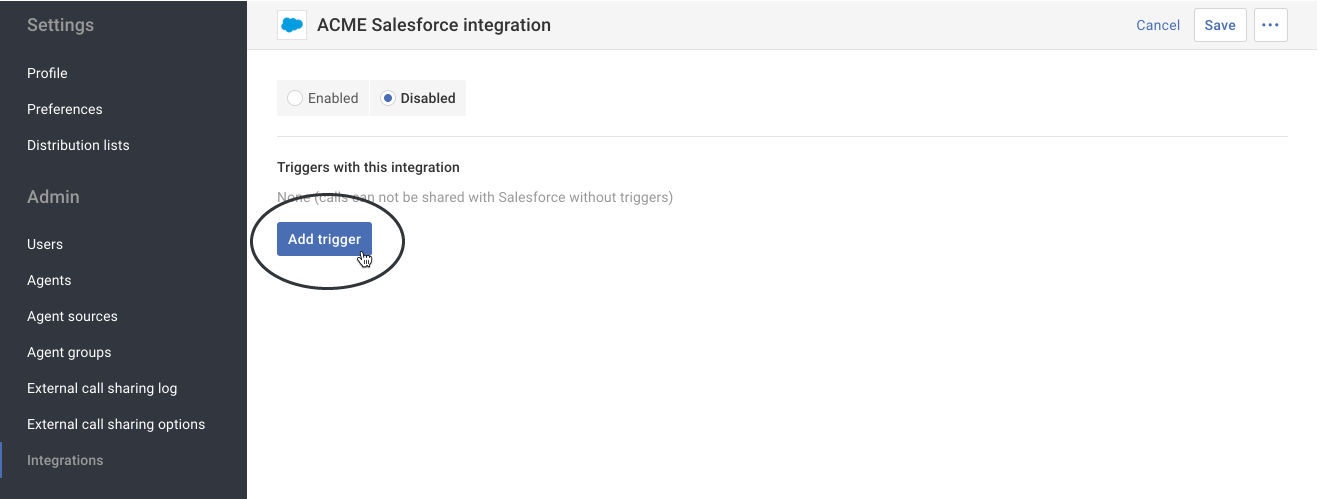
Set up a new customer interaction trigger in Creovai:
- Click the Add trigger button.
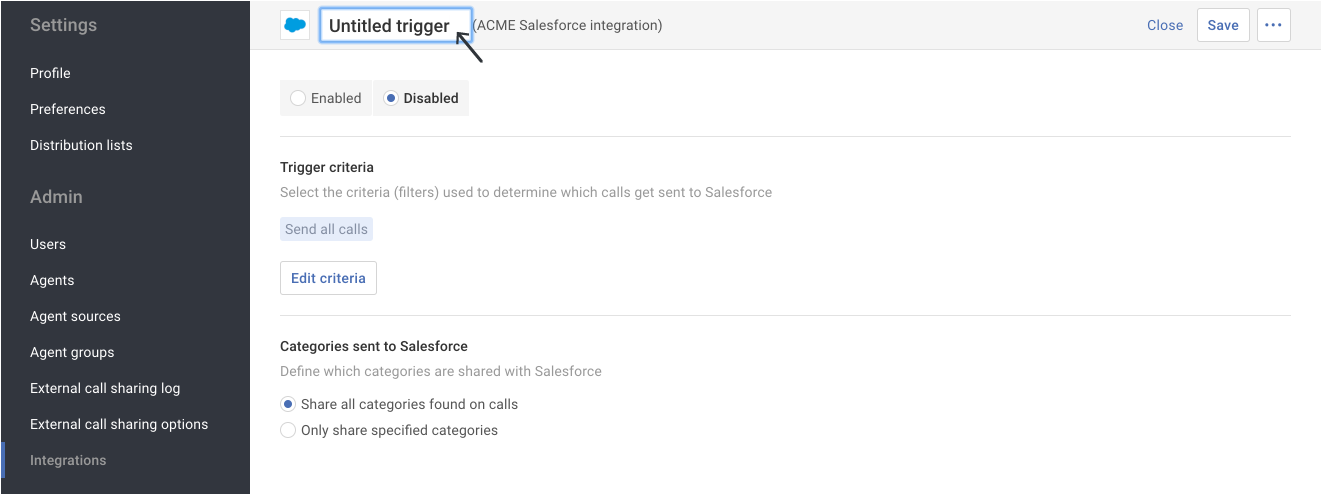
- Click on the Integration trigger title. In the blue box, rename the title and then press either the Return or Enter key on your keyboard.
Tip: You can also initiate the rename step by clicking on the Rename option in the Actions ( ••• ) menu.
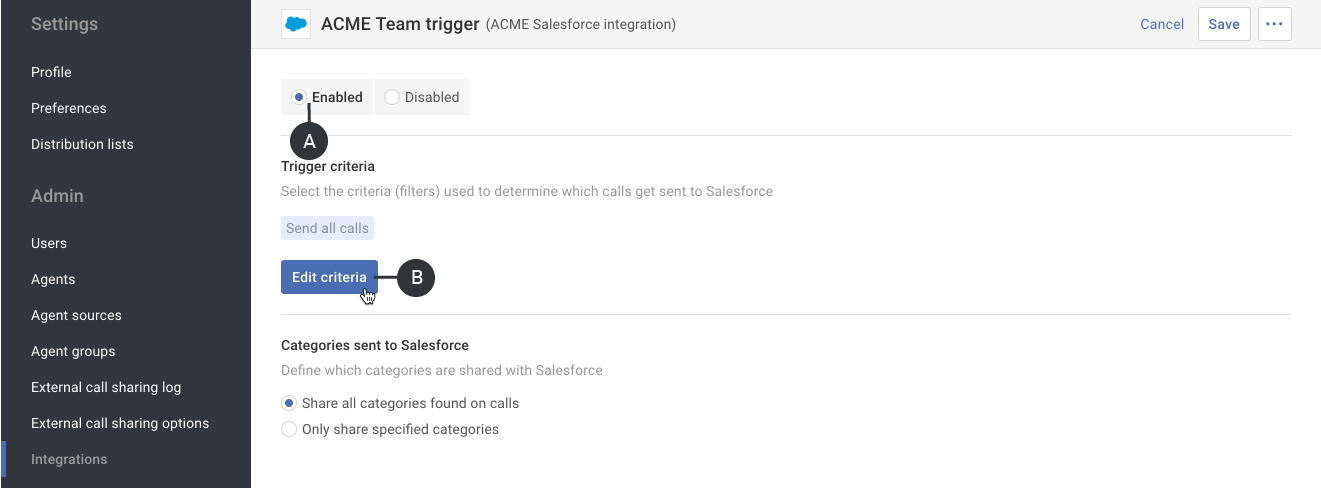
- First click the Enabled option (A) and then click the Edit criteria button (B).
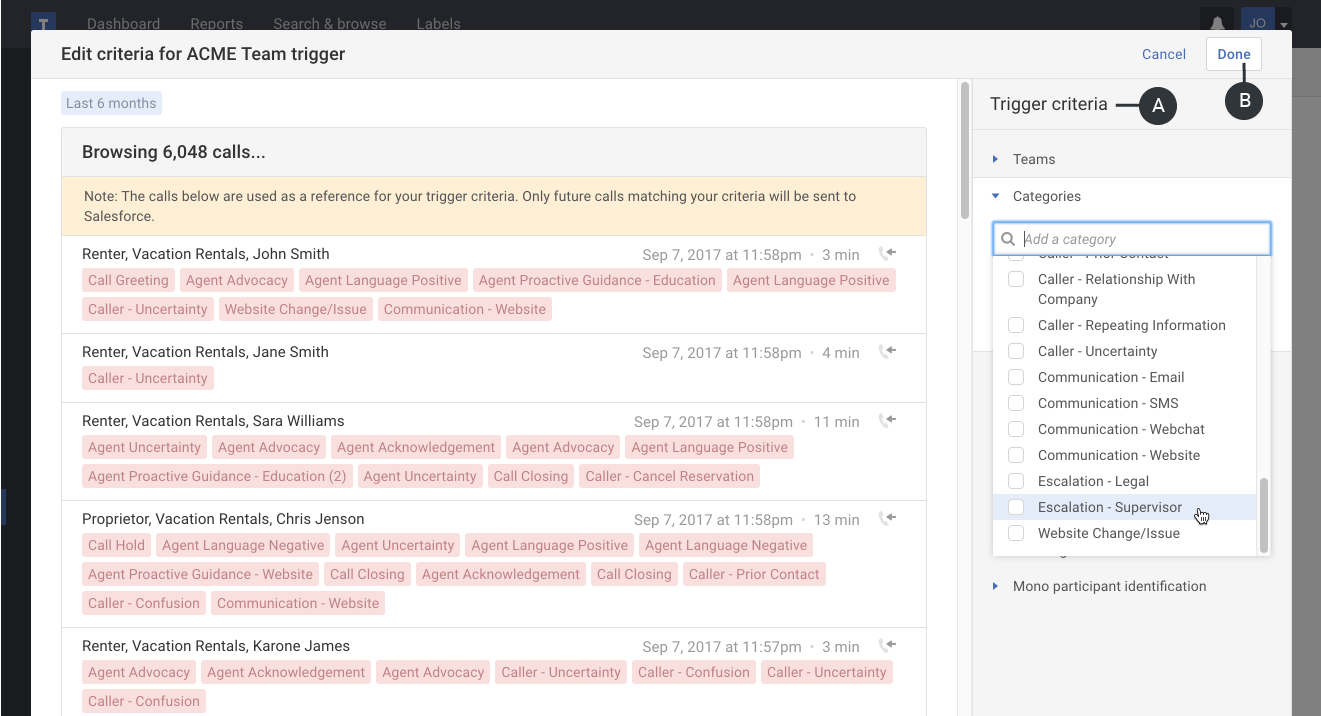
- In the Edit criteria popup, manually add any Trigger criteria you want applied to the interaction trigger (A). When you have finished adding your criteria, click the Done button (B).
Tip: The trigger criteria uses the same filter types found on the Search & browse page. Learn more about the filter types.
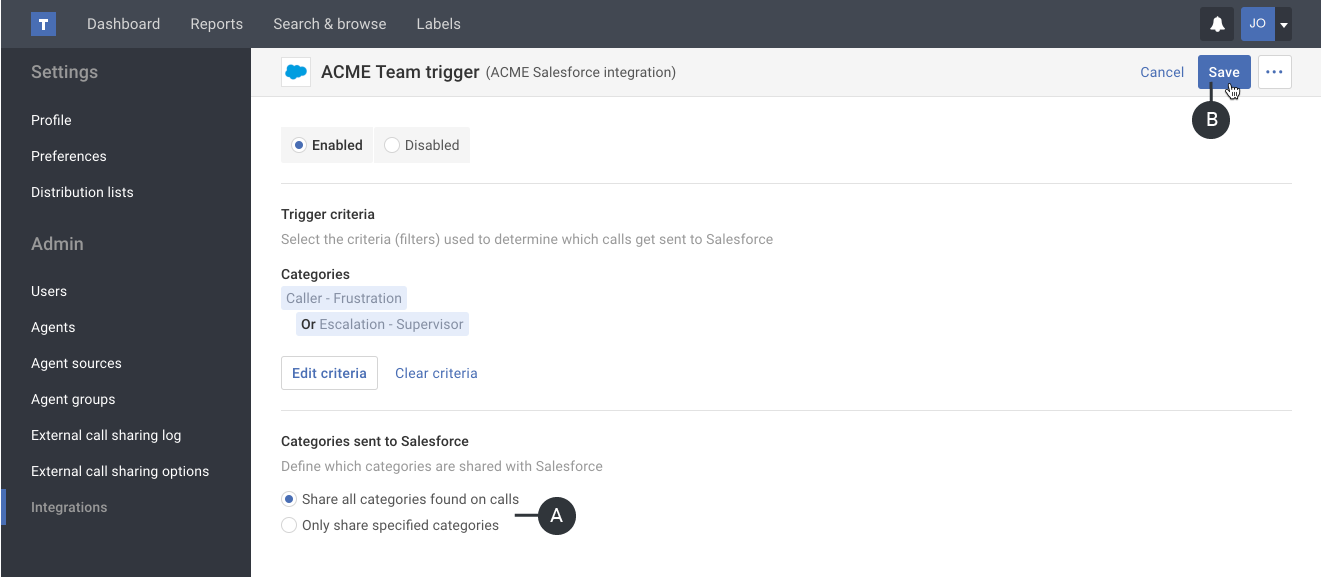
- First review the options of which Categories are shared with Salesforce and make changes if needed (A). Then click the Save button (B).
- If prompted for authorization, enter your information and click the Authorize button.