Integrate Salesforce Service Cloud Chat and Case with Creovai
This article shows you how to import your customer chat and case message transcripts and their metadata by integrating the Salesforce Service Cloud chat or case platform with Creovai. In this article, we cover the Salesforce side of the integration, including how to create a Creovai Connected App in Salesforce to provide Creovai what we need to import your chats or cases.
Note: Creovai's chat and case batch ingestors use the Lightning REST API to connect to Salesforce and retrieve chats or cases.
Before you begin:
- You need a Salesforce account with administrator privileges to create the connected app. This account will connect Salesforce with Creovai's batch ingestor to retrieve your chats or cases.
- Be sure your organization has also created a generalized Salesforce integration user account. You share this account's credentials with Creovai to build the secure chat or case integration.
Getting started: Using your administrator privileges, log into Salesforce as a generalized Salesforce integration user. Under the Home tab in Salesforce Setup, search for “App Manager” in the search bar and select it to open up the Lightning Experience App Manager setup.
Create a new Creovai Connected App in Salesforce
- In the App Manager, click on New Connected App.
- Complete the following Basic Information fields:
a) Connected App Name: give your connected app a name that indicates the type of integration. For example, “Creovai Connected App”.
b) Contact Email: enter your Creovai Integrations Specialist’s email address: support@creovai.com
c) Entering a Description is optional, but we suggest describing the specific type of connected app you’re creating. For example, “Batch imports chats and metadata from Salesforce into Creovai”. - Complete the following API (Enable OAuth Settings) fields:
a) Be sure to checkmark both boxes for Enable OAuth Settings and Enable for Device Flow. This will generate the integration’s callback URL automatically.
b) Select “Access and manage your data (api)” as the Selected OAuth Scope.
c) Keep Require Secret for Web Server Flow option checked.
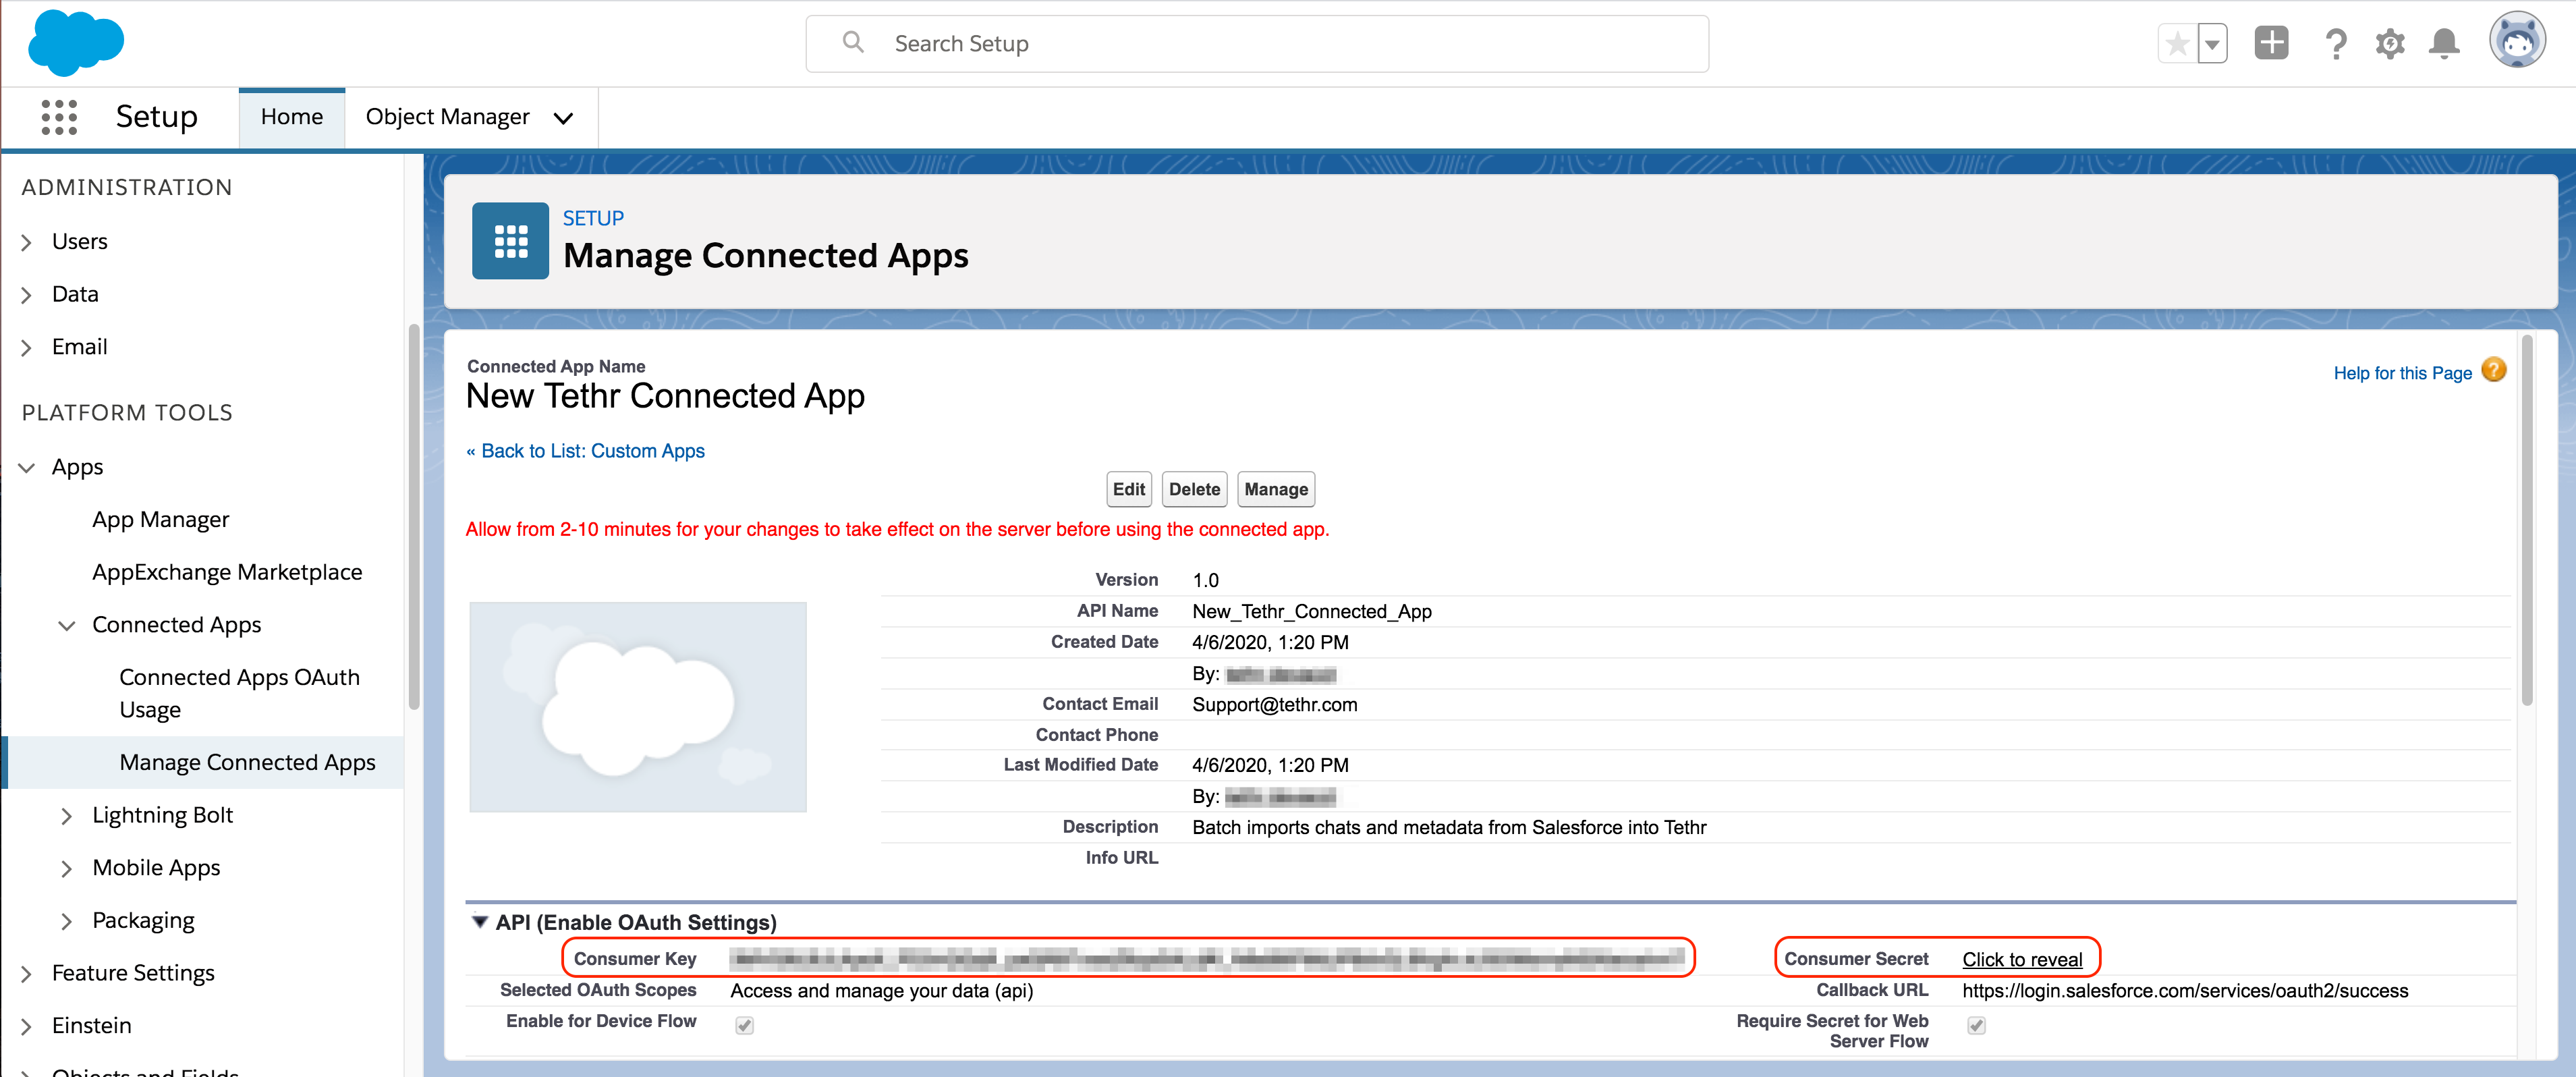
d) Select Save and Continue to create your new Creovai Connected App.Note: Salesforce will notify you that it will take between two and ten minutes to update the server, which is expected.
- Once you’ve selected Continue, both a Consumer Key and a Consumer Secret identification string will be generated as shown below. Creovai will need both of these strings as well as the username and password of a generalized Salesforce integration user account to build a secure chat or case integration.
Required: Please provide Creovai with the credentials for a generalized integration user account that your organization has created in Salesforce. This prevents you from needing to provide any personally identifiable Salesforce account information to Creovai and ensures the username and password provided to Creovai will not change over time.
- Finally, we’ll need a security token from the generalized Salesforce integration user account we mentioned in the Before you begin section. Typically, this security token has already been generated and saved somewhere.
a) The security token can be regenerated in the user Settings under the user profile as follows:
b) Within the user Settings, using Quick Find search bar, search for “security token.” Select the result “Reset My Security Token” and click the button to Reset Security Token. This will deliver the token via email to the integration user’s email address.Important: If you don’t see an option to “Reset My Security Token” when you search, it’s likely due to Login IP Restrictions enforced on the user profile. Follow the instructions below to loosen the restrictions and allow Salesforce to connect with Creovai via the API.
Permit IP traffic between Salesforce and Creovai via API
If you don’t see an option to “Reset My Security Token” when you search, it’s likely due to Login IP Restrictions enforced on the user profile. To permit IP traffic between Salesforce and Creovai via the API:
- From the Setup screen, search for “connected” and select Manage Connected Apps.
- Choose the new record you created in step 2a (in the Create a new Creovai Connected App in Salesforce section) from the list of Connected Apps. In our example, this would be labeled “Creovai Connected App.”
- Next, select “Edit Policies,” change IP Relaxation to “Relax IP restrictions” and select Save.
Provide the app credentials to Creovai
Once you’ve created your Creovai Connected App, provide the following credentials to your Creovai Integrations Specialist. These Salesforce credentials are necessary to configure Creovai’s batch ingestor to retrieve chats or cases from Salesforce Service Cloud via the new Creovai Connected App. Credentials can be found within the Creovai Connected App once it’s been created and configured, covered in the section Create a new Creovai Connected App in Salesforce
- Username of the account used for the connected app. Note that this should not be the username of the administrative account used to create the connected app.
- The password of the account.
- The Consumer Key.
- The Consumer Secret.
- And the Security Token.
Important: Consumer Secrets should always be sent securely using encryption, never in plain text. Contact your Creovai Integrations Specialist for help sending Consumer Secrets securely.
Work with Creovai to enable and automate chat or case retrieval
Once we've verified that your chats or cases and their metadata are flowing from Salesforce Service Cloud into Creovai, and automated the process, you will work with a Creovai Customer Success Manager to begin generating insights about your customer interactions.